Experimenting Producing AVIF Images with Node.js
I've wanted to experiment with writing shorter and easier to digest blog posts on interesting web topics. So, this is my first exploring the AVIF Image format!
AV1 Image File Format or AVIF is an exciting new image format that can work with the web. It has been developed by the Alliance for Open Media aiming to be an open-source and royalty-free image format. It already has adopters some big-name adopters like Netflix, which is interesting to see.
I got excited about the possibilities for the new format and had a little gander at some of the analysis by some people much smarter than me to see what the deal was. The first post I looked at was AVIF vs WebP by Daniel Aleksandersen, which found against a baseline of JPEG there was a median file size reduction of 50.3% compared to WebP's 31.5% reduction. Similarly, Jake Archibald did a nice comparison for a photo of an F1 car where WebP came in 57.7% of the size, and AVIF an impressive 18.2% of the size.
I was intrigued myself and saw that Sharp recently merged AVIF support in their Node.js library so I decided to have a little experiment with the new format.
It's important to state here this specific blog post is not about comparing file sizes or perceived quality of output, as that is a fairly exact art and you can read all about the pitfalls of attempting that in this great post by Kornel Lesiński. Rather, this post is more about how you can create an AVIF image using Node.js today.
To start with I found this nice high-resolution image of Saturn on Wikipedia and thought I'd use it myself as a test image.
After this I went ahead and created a new Node.js project:
mkdir avif-sharp
cd avif-sharp
npm init
npm install sharp
I then wrote a little code snippet that exports a WebP image and another in the new AVIF format:
const sharp = require("sharp");
const fs = require("fs");

fs.readFile("saturn-original.jpeg", (err, inputBuffer) => {
  if (err) {
    console.error(err);
    return;
  }

  // JPEG
  console.time("jpeg");
  sharp(inputBuffer)
    .jpeg({ quality: 50, speed: 1 })
    .toFile("saturn.jpeg", (err, info) => {
      console.timeEnd("jpeg");
      console.log("jpeg", info);
    });

  // WebP
  console.time("webp");
  sharp(inputBuffer)
    .webp({ quality: 50, speed: 1 })
    .toFile("saturn.webp", (err, info) => {
      console.timeEnd("webp");
      console.log("avif", info);
    });

  // AVIF
  console.time("avif");
  sharp(inputBuffer)
    .avif({ quality: 50, speed: 1 })
    .toFile("saturn.avif", (err, info) => {
      console.timeEnd("avif");
      console.log("avif", info);
    });
});
The code uses console.time and console.timeEnd to get logs on how long these processes took. Running the code created three files, one saturn.jpeg, one saturn.webp and one saturn.avif as anticipated. You can find the full API docs for AVIF in Sharp here if you want to play with the configuration options.
Results #
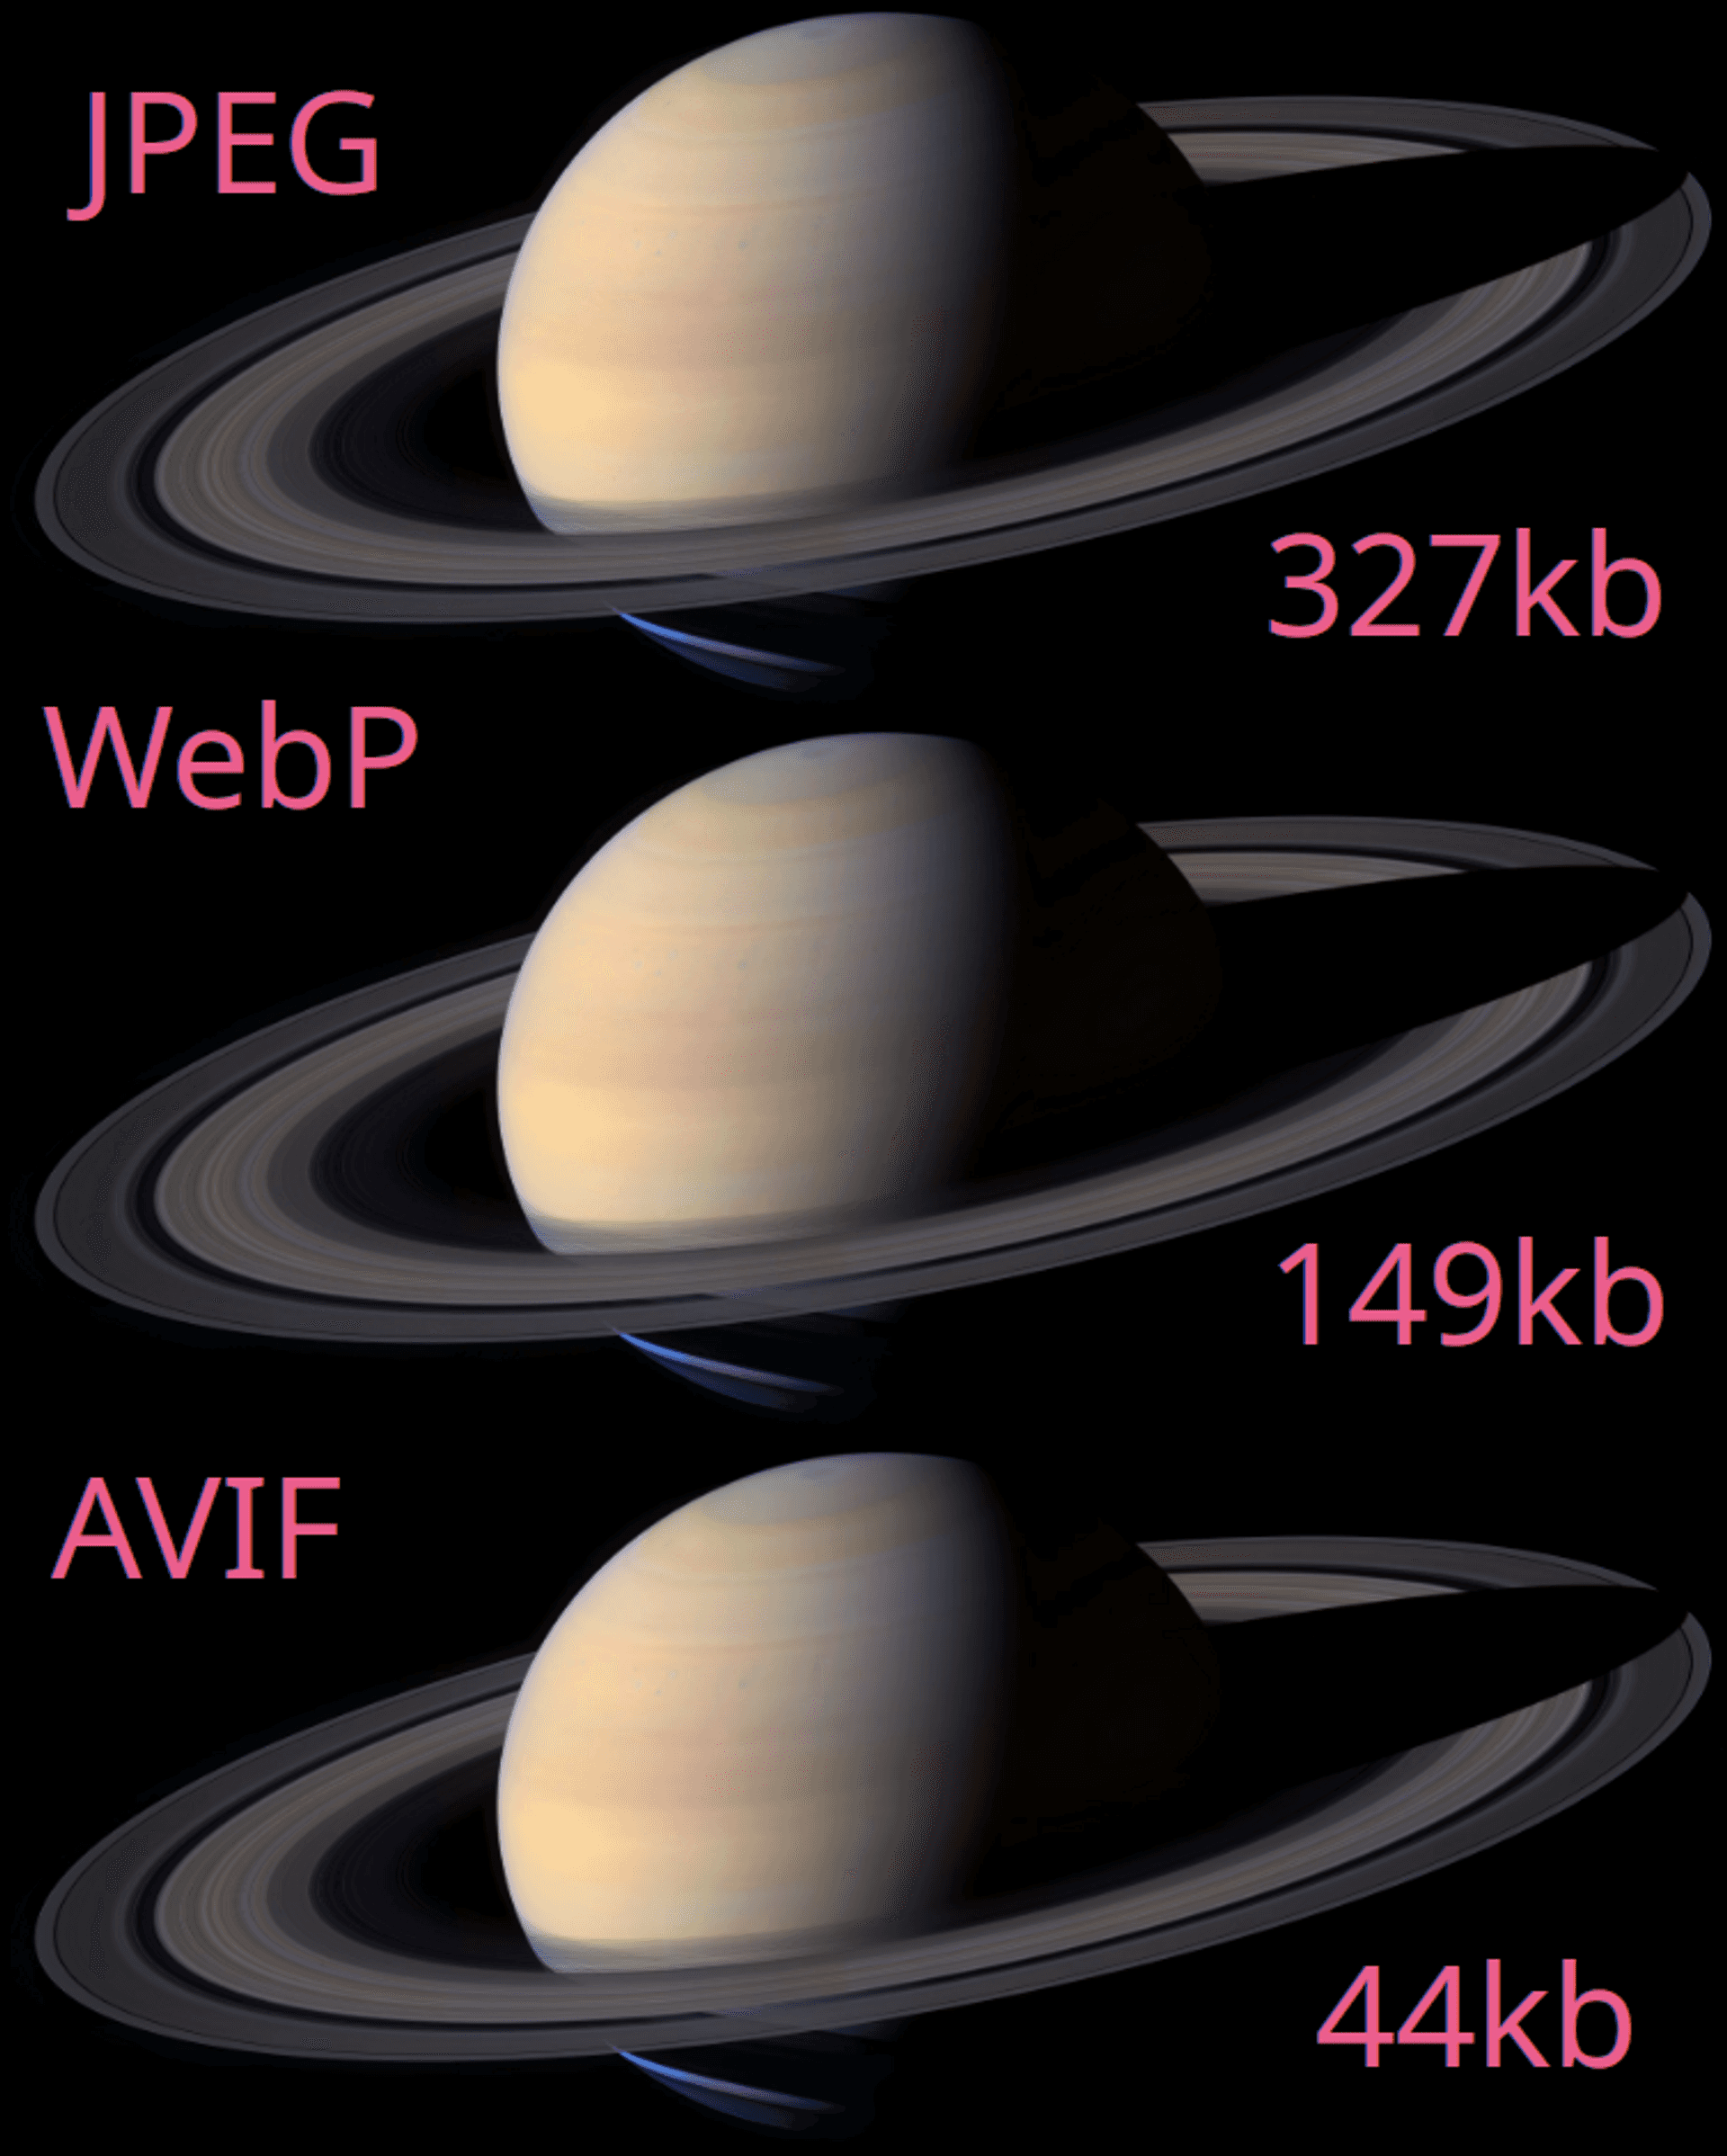
On my reasonably well-specced work machine, it took 287ms to output the compressed JPEG, 1288ms to output the WebP image and 22508ms to produce the AVIF image. Again it's important to note here that quality: 50 and speed: 1 are not an absolute and comparable parameters here so try not to read into them.
With regards to size, at these settings for the AVIF image was 43.7kb compared to WebP which was 149kb, so approximately 29.32% of the size of the WebP image. Compared to the compressed JPEG the AVIF image was 13.35% of the size.
As I mentioned, take these results with a pinch of salt and I'd defer to Daniel Aleksandersen's analysis of images at the same DSSIM and also take a look at BunnyCDNs take on the format for a more qualitative take.
I hope this shorter format still sits well, and that the blog post has shown you how you can create AVIF images using Sharp. Till next time!
Published